
![]() This image is released under a CC BY-NC-SA 4.0 Licence
This image is released under a CC BY-NC-SA 4.0 Licence
Buy this image as a print
BuyLicense this image for commercial use at Science and Society Picture Library
License![]() This image is released under a CC BY-NC-SA 4.0 Licence
This image is released under a CC BY-NC-SA 4.0 Licence
Buy this image as a print
BuyLicense this image for commercial use at Science and Society Picture Library
License![]() This image is released under a CC BY-NC-SA 4.0 Licence
This image is released under a CC BY-NC-SA 4.0 Licence
Buy this image as a print
BuyLicense this image for commercial use at Science and Society Picture Library
License![]() This image is released under a CC BY-NC-SA 4.0 Licence
This image is released under a CC BY-NC-SA 4.0 Licence
Buy this image as a print
BuyLicense this image for commercial use at Science and Society Picture Library
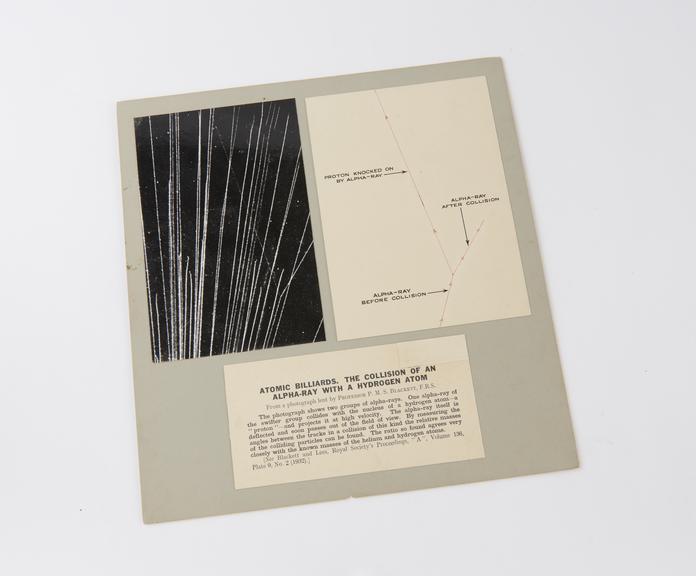
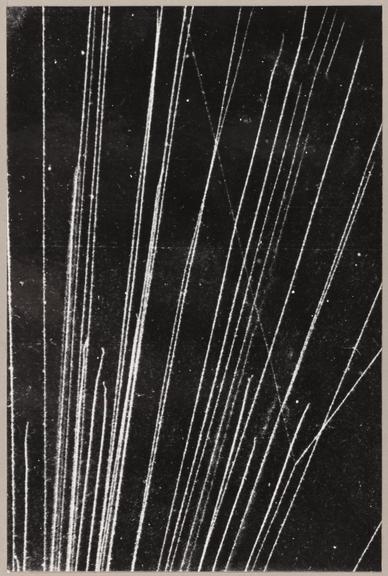
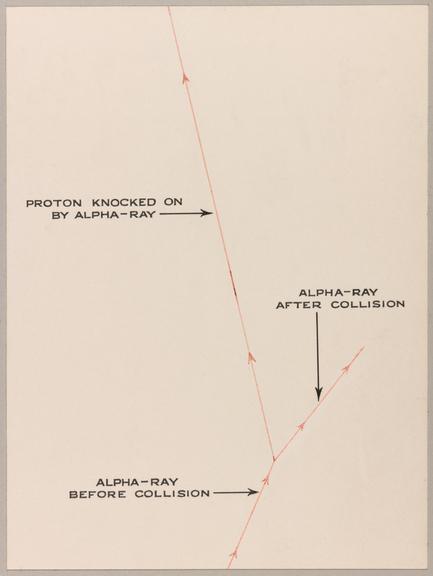
LicenseDiagram and atom track photograph showing the collision of an
Science Museum Group
© The Board of Trustees of the Science Museum
Photograph showing the collision of an alpha-ray with a
Patrick Maynard Stuart Blackett. Enquiries to Science Museum, London
Photograph showing the collision of an alpha-ray with a
Patrick Maynard Stuart Blackett. Enquiries to Science Museum, London
Photograph showing the collision of an alpha-ray with a
Patrick Maynard Stuart Blackett. Enquiries to Science Museum, London
Diagram and atom track photograph showing the collision of an alpha-ray with a hydrogen atom, on card mount (passe-partout framing without glass) with label, by Science museum photograpers, London, 1937.
Details
- Category:
- Nuclear Physics
- Object Number:
- 1937-717
- Materials:
- paper (fibre product) and cardboard
- Measurements:
-
overall (mount): 320 mm x 310 mm x 3 mm, .011 kg
photograph: 192 mm x 127 mm
- type:
- black-and-white print - photograph and diagram
- credit:
- Science Museum Photographer